Ever notice how some URLs begin with HTTP:// and others with HTTPS://? As we know, Google works diligently to make the website safer and has also started marking “not secure” if the web is not secure. So now there is a must to have HTTPS/SSL on your website. Adding an SSL certificate to your website has a lot of advantages, one of which is higher search engine rankings. Let’s explore SSL certificates in detail in this post, including their many varieties and how to set up a free SSL (Cloudflare) on your website.
What is an SSL Certificate?
The majority of websites in use today start their URLs with “HTTPS://” and display a green padlock that reads “secure” as a result of the use of an SSL certificate. But there is much going on in the background; that is not just an indication.
Secure Sockets Layer, also known as SSL, aids in creating a secure connection between your web server and website visitors. This ensures that all information exchanged between the two parties is private and that no third party has access to it. The data is encrypted end-to-end, so even if someone were to intercept the connection, they would not be able to utilize it for anything.
Steps you can use a free SSL certificate to secure your website?
The best and easiest way to get a free SSL certificate is to sign up on Cloudflare
Step 1- Create an account on Cloudflare
After providing your information, click “Create Account.”
Create an account on Cloudflare
Step 2- Configure your website /domain
Add Website to CloudFlare to Scan DNS Records
Click on Scan after adding your whole website address.
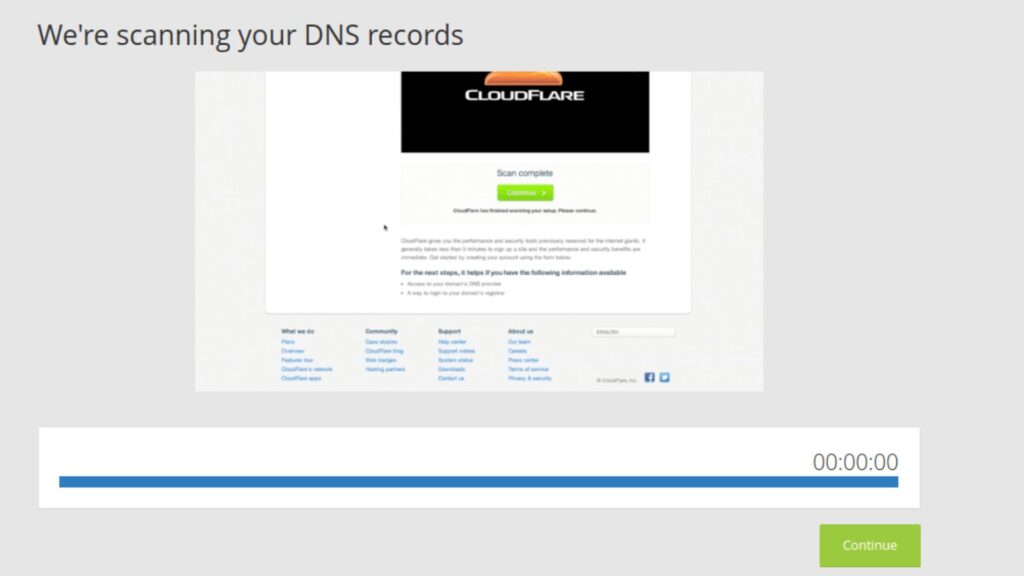
Your website will now be scanned by Cloud flare. Following the completion of the scan, click “Continue Setup.“
Step 3- Configure your website DNS records
As soon as the scanning is done, you may see an orange cloud in the domain areas. That means the configuration is accurate. Mail and FTP are bypassed via Cloudflare and should display grey clouds.
Make sure your main domain has an orange cloud next to it.
If you see the domain area with an orange cloud, then click on ‘Continue’.
Step 4 – Cloudflare Plan Selection
As we want a free SSL certificate, go for the free plan.
For maximum websites, the free Plan might be sufficient. Just pick it out and click on ‘Continue’.
Step 5 – Update Your Nameservers
If you want to point your Nameservers to Cloudflare, to do that you would need to log into the domain registered account and find the setting to trade the Nameserver.
Change your domain’s nameservers (DNS) to the ones provided by Cloudflare
Delete the existing entries, and add the DNS that Cloudflare provided.As soon as you have got modified the Nameserver, come lower back to Cloudflare and click on ‘continue’. But it may take up to 24 hours for the Nameservers to propagate.
Step 6 –SSL Website Setup
Even as your name servers are being set up, you can get to SSL configuration. Scroll down to Settings precis and you may see SSL: full. Click on full and you may be directed to the ‘Crypto’ web page.
Flexible SSL
Subsequent, to the SSL alternative, there is a dropdown list. Choose ‘flexible’ from there. The SSL certificates can be issued in an hour or so. You can check the reputation from the ‘Crypto’ page as soon as it’s far issued.
Step 7- Redirect Traffic to HTTPS
That is the final step of the configuration. We can put in place a web page rule to redirect all visitors to your website to HTTPS.
From the website view, click on web page guidelines from the top of the page. Now we want to add more than one regulation right here.
You want to add www.Mywebsite.Com/* And mywebsite.com/* one after the other, and for each of these URL styles pick out ‘constantly Use HTTPS’. One thing to note right here is that this selection will only be available once the SSL certificate is issued.
The configuration will take a few minutes to undergo. As soon as completed, you could then open any web page on your website, and it’ll open on HTTPS.
Setting up Push Alert Web Push Notifications for HTTPS
Now, you may sign-up for Push Alert and select HTTPS for the website URL. You’ll then have to add two files to your net server. Those are to be had in the combined section of your Dashboard. You could study extra approximately it from our documentation section.
What did you think of this article? Did you enjoy it? Let’s discuss this in the comments below. For more related blogs check ourblog page at binmark. in.